


Easter is coming, and there’s nothing like a craft-ivity afternoon with your little ones to make memories, establish family traditions and celebrate this coming festival. Check out these easy and fun Easter DIY ideas that you and your child can make at home.
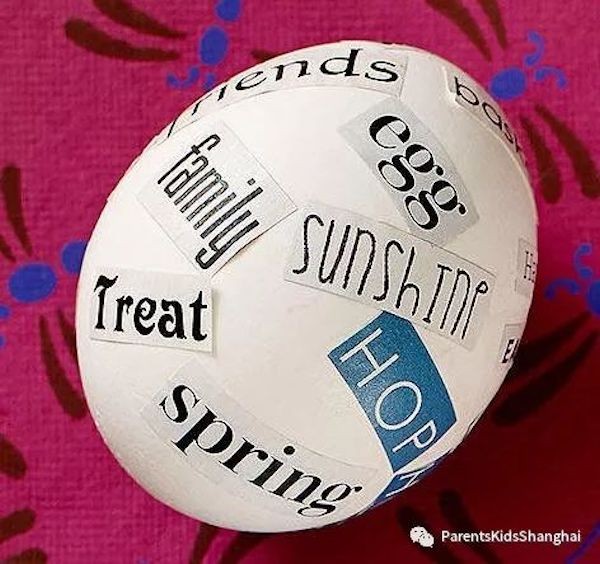
Start with hard-boiled eggs cooled to room temperature. Look in magazines for terms related to Easter or springtime and clip them out (or customise an egg for each family member, choosing words to describe personalities and interests). Apply a glue stick to the backs of the clipped words, then smooth them onto an egg.
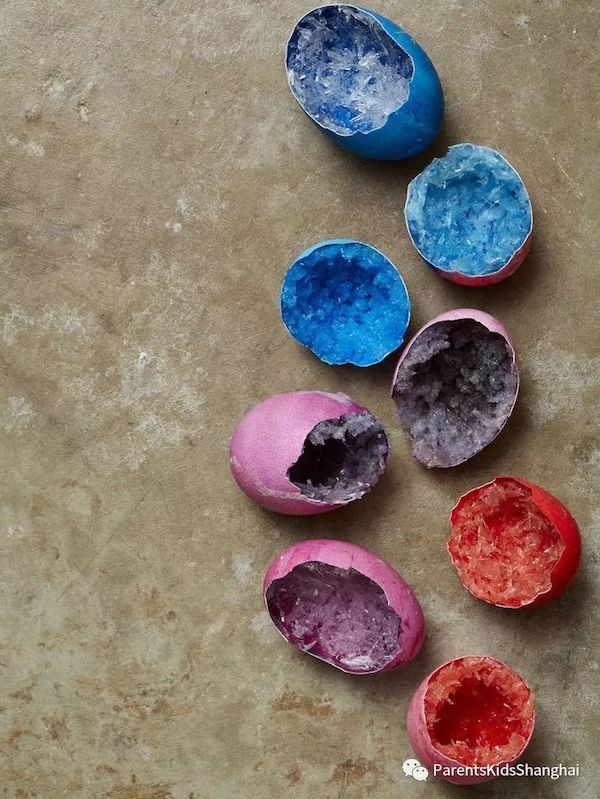
Grow glamorous crystal geodes with just a few household basics.
What You'll Need:
Eggs, egg dye (optional), craft glue, epsom salt, food coloring, toothpicks
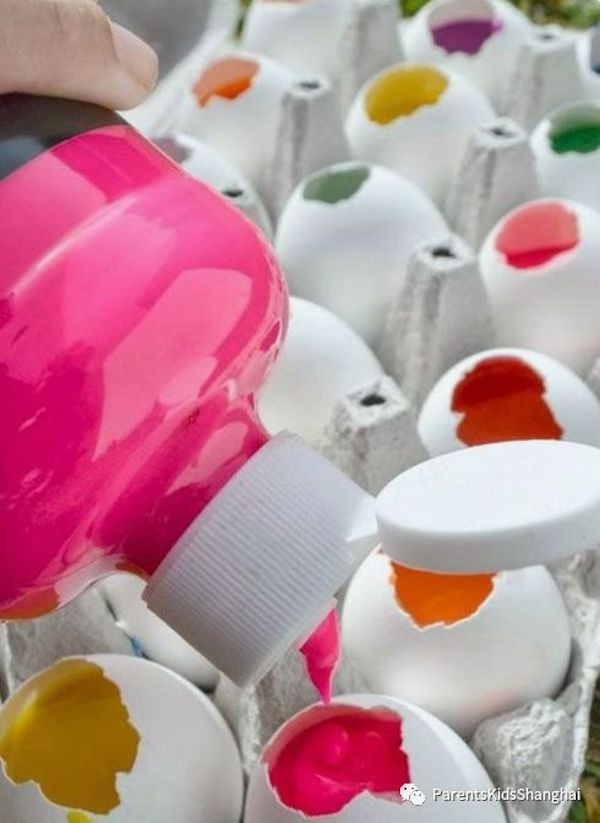
1. Help kids crack eggs at the narrow end and carefully widen the opening to the size of a quarter. Empty into a bowl.
2. Set shells in a bowl of hot water to rinse. Then gently remove the membrane. Turn the shells over on a towel to dry.
3. Set the shells inside the carton. Brush the entire inside with a thin layer of glue and dust with Epsom salt (this will act as a starter crystal). Let dry completely (a few hours).
4. Boil 1 cup water and remove from heat. Slowly add ½ cup Epsom salt and stir until it’s dissolved. Continue stirring in small amounts of salt until it no longer dissolves, then STOP.
5. Carefully pour the solution into your shells with a small ladle, filling to the top. Add a drop of food coloring to each egg, and stir gently with a toothpick. Place your shells at room temperature.
6. Check your eggs daily. If you find a thin, hard, jagged layer forming on the surface, gently break it up with a toothpick. After a few days, all the water will evaporate, leaving colorful geodes behind!
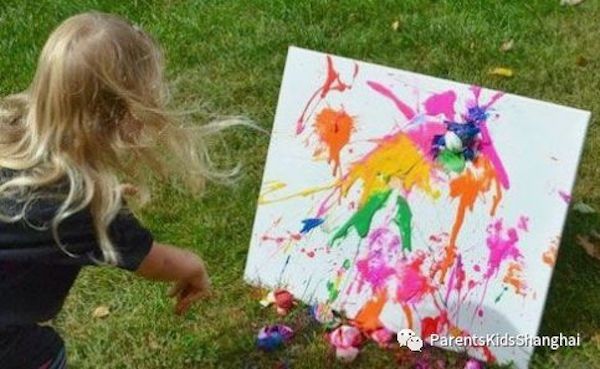
Beware – this one can get messy! Fill hollow egg shells with bright paint of different colours. Carry the eggs into the garden, set up a white canvas and let your kids create some bold modern art by smashing the paint-filled eggs against the white background.
Start with hard-boiled eggs cooled to room temperature. Look in magazines for terms related to Easter or springtime and clip them out (or customize an egg for each family member, choosing words to describe personalities and interests). Apply a glue stick to the backs of the clipped words, then smooth them onto an egg.
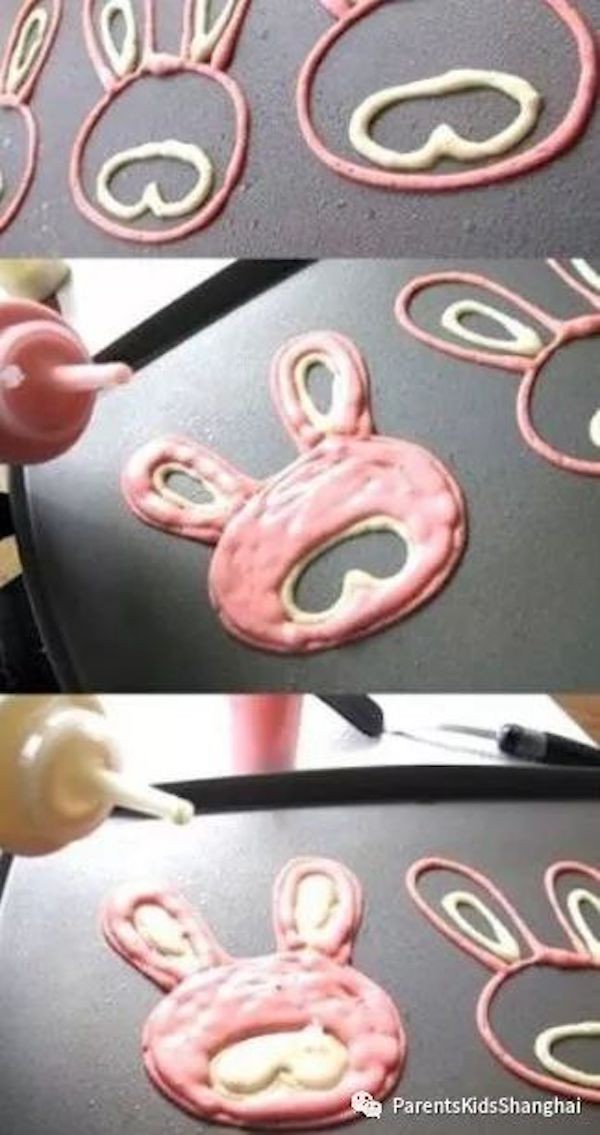

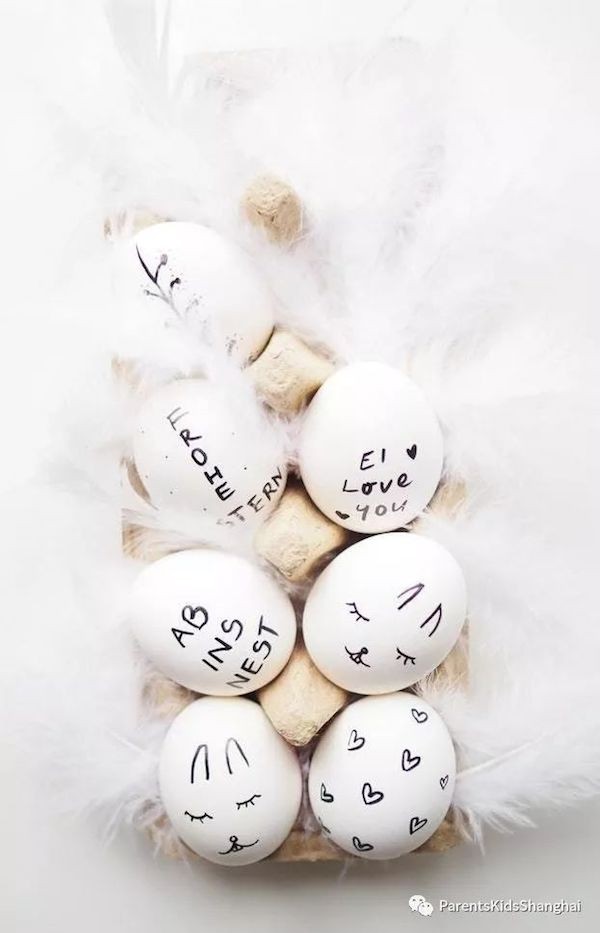
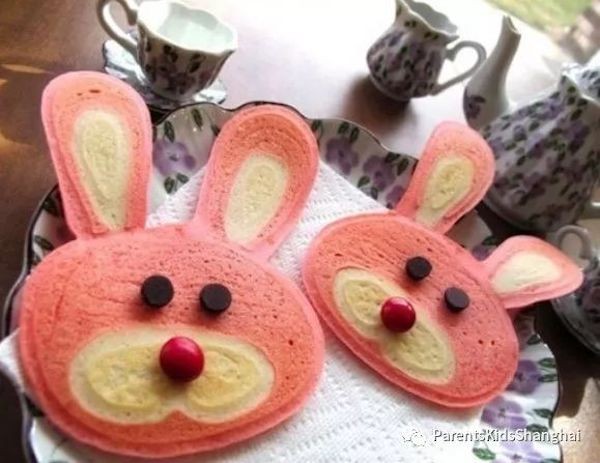
Show the children how to use markers to draw different mouths onto the label stickers or hole-punch reinforcements, then adhere them to the eggs. Stick on googly eyes. Cut and bend the pipe cleaners into arms, legs, hair—whatever takes yor fancy! Then attach with gluedots and behold your very own Easter creative.
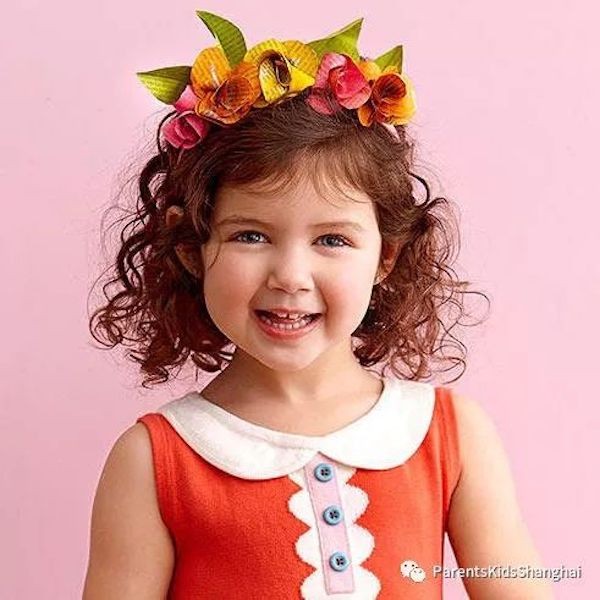
Humble newspaper is transformed into a jaunty Easter headpiece with a few snips and the aid of some basic craft supplies.
What You'll Need:
Newspaper, craft paint, paintbrush, scissors, floral tape, hot-glue gun and glue sticks, headband
1. Paint newspaper (green for leaves and colors of your choosing for petals). Let dry.
2. Download, print, and cut out flower petal template at parents.com/easter-petal.
3. Cut painted paper into 2 1/2" squares; stack squares, trace template onto top piece of paper, and cut out stack. Trace and cut leaves from green-painted paper.
4. You'll need seven petals for each flower. Roll one petal into a cylinder; pinch and twist the bottom. Curve other petals around center petal, pinching their bottoms around the first petal.
5. Tightly wrap floral tape around base of each flower to secure.
Hot-glue flowers to headband facing forward. Glue leaves around flowers to mask their backs and bases.

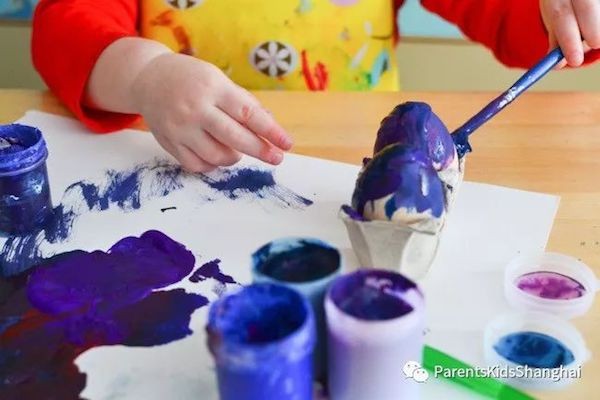
Take your Easter eggs deep into the cosmos with this gorgeous (and surprisingly easy) craft project.
What You'll Need:
Wooden eggs, tempera or acrylic paints (blue, purple, red and white), varnish to seal the paint and make the eggs glossy (optional)
the tricky part in painting the eggs is making sure they do not roll off the table, painting everything on the way. Use a couple of cells from an egg carton to hold them in place. The rest is taking paints out and having fun creating egg microcosms. The layers of paint need to be fairly thick to provide good coverage.
Once the paint was dry, dilute some white paint in water on a piece of paper and flicked it on the eggs with a brush.This created a suitable starry effect.
Finally, if you want to seal the paint, use varnish. It will protect the surface of the eggs against water, and if they get dirty or dusty, it will be easy to wipe the dirt and dust off. Glossy varnishes will also make the colours more vibrant and the surface smooth and shiny.

Kids will love creating these cute planters. Gather white and pink felt, googly eyes and a pom pom, and attach to a white spray-painted tin can to make the bunny. Fill the tin with earth and daffodils – the perfect spring-time flower.
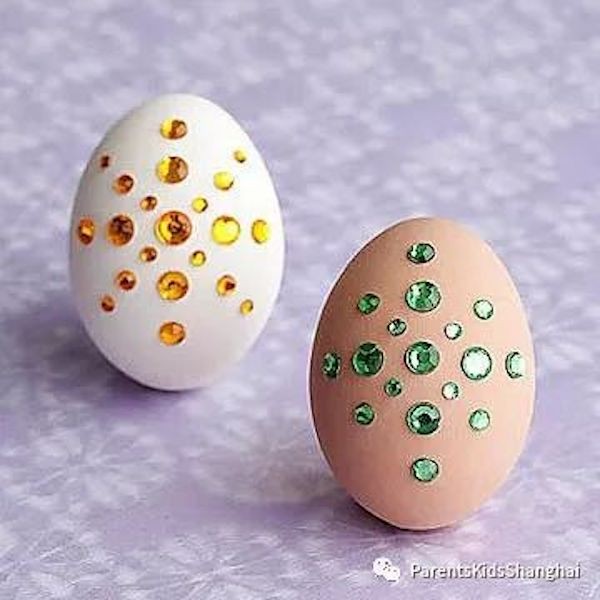
Kids can arrange adhesive-backed rhinestone jewels into one-of-a-kind designs on eggs.
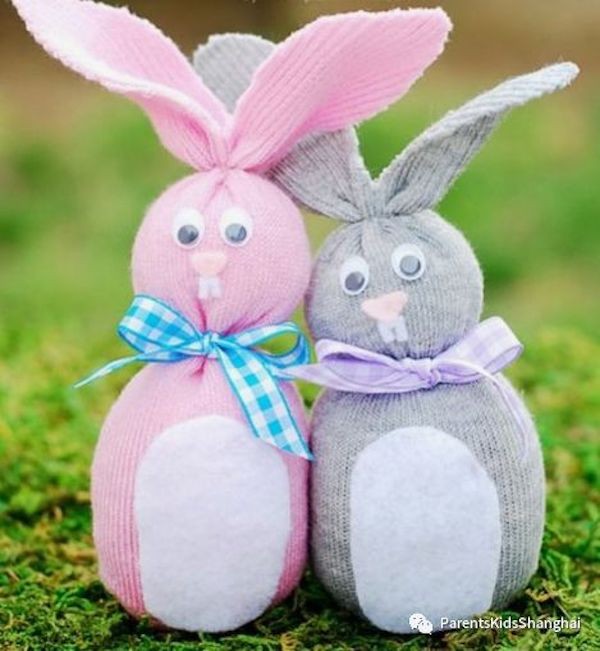
To make these cute Easter sock bunnies, fill a pair of socks with rice, and fasten with clear elastic bands. To decorate, stick on googly eyes, felt, ribbon and a pom pom tail.


 沪ICP备15036271号-2